Monday 28 July 2014

Ho Ho Ho Merry Christmas

Good Morning to Everyone, 

Wow its back to me, these weeks are flying past. 

Today I am sharing for you a Christmas tag. The tag is probably for a really big present but you can resize it to suit your needs. 

I took a plain piece of card stock and used my red brick distress ink and inked the background.. I didn't want just a solid colour so thought this would work well. 

I took my stamp he is from the Yuletide range and is "Claus" and stamped it on to 300gsm white stamping card, and coloured his face with promarker pens, I added glossy accents to his glasses and stickles glitter glue to his beard and hair. 

I matted this onto red and gold card stock.

I added a bordered and inked this in green, and added gems to the center of each point. 

The poinsettia is a die cut and I coloured this in using two different reds and layered them up, I added gold gems to the center of the flowers. To finish it off I added red spotty ribbon.


I adore this Santa he is so cute and makes me feel like I could just have a cuddle of the "real" Santa. 


That is it for me for this week, don't forget to pop back and see what Sue has on offer for you tomorrow. 

Don't forget as well you can find "Bee Crafty" on Facebook we have a lovely little group that you can share your creations in. 

Crafty Hugs
Kelly
xxx

Sunday 27 July 2014

Fishy Wonders

Hi Crafty People, 

How are we all doing? 

Today is puppy sitting day whilst watching the F1 well trying to watch the F1 whilst entertaining the puppy.

Today's card is another Fathers Day card, I made this for a lady who requested it through my Facebook Page, I received great feedback on the card and was informed the recipient loved it. 

The criteria of the card were; for a male, with sea fish for the theme, it was a gift card for some Euro's to go in. 

Quickly got my thinking cap on, and looked for inspiration on what I could do, I am not going to lie it was a head scratcher to start with, I come across a site that allows you to download different elements of digital stamps and you can create your own scenes with them; perfect just what I needed. So the digital aspects are from the site but the scene is my own. 

I created it using my publishing software, printed it out and coloured it using Letraset Promarkers. 

I matted and layered the card up, added glossy accents to the eyes and a sentiment which I cut using the Cricut machine. 

That was that; the front was done now to tackle the inside. 


The front


 Close up of the scene


 Close up of the eyes on the fish


The inside of the card - the white card in the pocket pulls out so you can put the gift card/money inside the pocket


The inside was matted and layered with the same blue and white card as the front. 

I created a pocket and used a white gel pen to edge around the pocket and put fake stitching detail to it - I kind of tried to make it look like the back pocket of a pair of jeans - I think it worked. 

As requested the inside was left blank so the family could write their own verse and sentiment inside. 


So that is the completed card. What do you think? Do you think I got the requirements right? 

I am going to enter this into the following challenges:

Suzy Bee's Bloomin' Challenge - #39 Anything Goes - 01/08
Brown Sugar Challenge - #104 For the Boys - 01/08
Crafty Catz Challenge - #24 Anything Goes - 01/08
Sister Act Card Challenge - #67 Anything Goes - 01/08

That is it for me for today. Don't forget to pop back tomorrow, to see the card I have for you from Bee Crafty. 

Crafty Hugs
Kelly
xxx

Thursday 24 July 2014

Gingerbread Delights

Today I am doing another Christmas in July. 

I am really disappointed with myself I had loads of plans for Christmas in July but time ran away from me and everyday life got in the way.. 

I thought I would share with you another "Belly Box" from My Scraps Chick Designs, this is a cutting file that comes in different formats and can be cut using an electronic cutting machine, don't quote me on this but I am sure it comes with a PDF printout so you can cut it by hand, but you would need to look into this before purchase. 

I cute this little cutie out using my Cameo - I am having to organise myself so my cameo and explore get equal time - ha ha

I cut him using a brown card stock from The Papermill" I used vintage photo distress ink to ink around the edges of him, for his hat I coloured with promarkers and used Holly and Berry Red, with a Yellow for the star, I added white liquid pearls to the red and yellow stickles to the heart.  I used a Peachy Keen face stamp and used glossy accents for his glasses, and chalked some cheeks on to him. 
/


The challenges I would like to enter him into are:


Crafting for all seasons - #82 Christmas In July -  07/08
City Crafter Challenge Blog -  Christmas in July - 29/07
Papertake Weekly - A Jolly Holiday - 29/07
Through the Craftroom Door -Anything Goes - 29/07
Creative Knockouts - Christmas In July - 30/07
Crafty Girls Challenge - Anything Goes - 30/07
Southern Girls Challenge - Christmas Is A Coming - 14/08


 I hope you like him, he is so cute!

Thanks for stopping in

Crafty Hugs
Kelly
xxx

Monday 21 July 2014

Butterfly Flutterfly

Hi Everyone, 

How are we all today?

Today's  card I have concentrated on just the Inkables Masks that you can get from Bev and  how they can look without having to be mega grungy with them. 


 I used 
Inkable - Honeycombe Mask


So I cut down my card stock to 5.25 x 5.25 inches.

I matted this with the next layer that I cut to just under 5 x 5 this layer was plain white cardstock and it was run through my calibre with the  Chain Link Fencing mask, once it was embossed I used my Worn Lipstick Distress Ink and inked through the stencil. This is about as inky as I get. 

Next I cut a strip the same width but about 4 inches high, I used a border punch to punch along the bottom, I then ran this through the calibre with the "Honeycombe" mask.  I very gently ran a make up sponge done the edges with some of the worn lipstick.  Before adhering it I added a piece of ribbon and tied it with a bow. 

Next I stamped out using the worn Lipstick the sentiment "Hugs and Kisses" and matted this up. 

For the Butterflies I cut different size butterflies out, and embossed these with the Honeycomb mask.  I added liquid pearls down the centre of the butterflies. 

To finish the card I added three pieces of card candi down at the bottom.

I hope you like the card, and don't forget to pop back tomorrow to see what Sue has for you - I am sure she will have something special for you as normal. 

Take care see you next Monday 
Crafty Hugs
Kelly
xxx

Saturday 19 July 2014

Hearts For You

Good Afternoon guys, 

Hope you are all keeping dry, so far we have had a bit of rain but nothing like what was forecasted. 

Today I am sharing for you a wedding anniversary card (I have plenty to share with you as July is my busiest month for anniversary cards) 

This card is one that I made for my husband’s cousin and his wife, the celebrated 14 years of marriage the other day. 

I first seen this idea on Pinterest, unfortunately it has been pinned that many times I am having problems getting back to the original idea. 

The card base is a A5 card base and is matted with black and white card, the top layer was a plain white card section that I embossed using one of Sue Wilson A4 embossing folders. 

I cut the hearts and the butterflies out with my Cricut machine. I used my promarker pens (lobster Pink, Yellow, and Grass) to colour in the die cut pieces, I went for vibrant colours so they stood out from the black. I embossed the top layer of each heart and matted a contrast butterfly to each piece. It was finished of with a sentiment of "Happy Anniversary"

Really simple for me, normally I love to have a coloured image in and flowers all over, but I think it actually looks pretty cool, and I am thinking some Christmas cards like this would look lovely. Watch this space - I will be having a play later and see what I can come up with. 


The challenges that I am entering this into are:

Crafty Catz #240 - Hot Summer/ or Hot Colours -  25/07
Sister Act Card Challenge #66 - Anything Goes - 25/07

Crafty Girls Challenge - #22 - Anything Goes - 24/07
7 Kids College Fund - #104 - Anything Goes - 30/07
Just For Fun - #1 - Anything Goes  - 01/08

I hope you like it and I will be back soon to share some more ideas with you. 

Crafty Hugs
Kelly
xxx

Wednesday 16 July 2014

Happy Belated Fathers Day

Hi Guys, 

So I have had a few scheduled blog posts for whilst I was away but I didn't get as many up as I wanted to before I left (how bad am I time just ran away from me) 

So anyway I am back from a fantastic week in Turkey, whilst we were there me and Alan celebrated our 5th wedding anniversary it was brilliant, just the two of us, spending time around the pool in 38 degree heat sipping cocktails most the day - just what the doctor ordered. 

Anyway today i have a card for you I made for fathers day. This is the card I gave to my dad. How late am I in getting this up on my blog.  OOOPs


So I used a Lili of the Valley image -  I love this image and it was perfect for my dad, we have dogs in our family (well he has three) and you will often find him sitting out in the garden with one of the dogs sat on the bench next to him, so as soon as I seen this I knew I had to use it!


I used my promarker pens to colour the image in with and chalk for the "sky" I added white liquid pearls to give some extra detail to the image. 

I used brown and green and matted and layered the papers up. I added a cloud with the word "DAD" in and a sentiment of "HAPPY FATHERS DAY" All the die cuts were cut using the cricut expression original machine. I added fake stitching around some of the letters and the cloud. 

I finished the card by adding string and card candi to it. 

I will be entering this into the following challenges:- 

Animal Friends Challenge - #16 Must have animal - 01/08
Crafts Galore Encore Challenge - Must use digi or rubber stamped image - 01/08
Crafty Hazelnut's Patterned Paper - Anything goes using patterned paper -01/08
The Sisters of Craft - Anything Goes - 01/08
Sarah Hurley 365 - July - Celebrations -01/08

I hope you have enjoyed the card and I look forward to reading your comments. 

Crafty Hugs
Kelly
xxx

Monday 14 July 2014

Rose Garden Abi - Flower Power

Good Morning All. 

How was your weekend?

Today I have for you a card that I think would go great for an female occasion, thank you, thinking of you, birthday or just hello. 


Today's card I created using a die for the shape of the card. I matted this up with white and purple card stock, using different sizes for layers.

For the final layer of the white card just behind the image I used the Inkable "Honeycomb full" mask and ran it through to give it an embossed texture. I stamped my Rose Garden Abi stamp and coloured her with promarker pens. I added fake stitching around her and used a border punch to punch down one edge of her layer. I added two pieces of ribbon, a dark purple ribbon and then a sheer purple ribbon, I tied a knot bow at one end. I added three butterflies, and card candi and then used the "Flower Power" stamp that you get with the main stamp plate.

Isn't she really cute!  I love her and I think she can be used for some many different occasions.


Don't forget Sue will be with us tomorrow for some more of her wonderful creations. 

Hugs Kelly
xxx

Monday 7 July 2014

Yellow, Grey and A Tin Man

Hi Guys, 

Thanks for stopping back in today. 

Today I have a card that is great for a male. 


To create the card I folded and created an A5 Card base, matted with a grey layer. I added fake stitching to this layer to give the eye somewhere to stop. Next I cut down some stamping card to fit within the grey. I used a yellow ink pad and stamped the "Bark Positive" background stamp. I repeated this to create three sections. On the bottom layer I added twine and finished it with a knot. I matted this on 2 layers of foam tape and placed it at the bottom, the middle section is on one layer of foam tape and the top section I glued down flat.  I then used a yellow piece of card blank cut it down using a circle die, and used my grand calibre to run it through with my Inkables "Honeycomb" mask to give the embossing to it. Finally I stamped my "Tinman" stamp added stitching around him and matted him onto the grey card stock, I cut a shape out for the sentiment and used the Wordage "Thank You" Stamp, and added three pieces of card candi. 


That is all for me for today, don't forget to pop back tomorrow for more creations from Sue.

Crafty Hugs
Kelly
xxx

Sunday 6 July 2014

Welcome Dora - Dora the Explorer

Hi Guys, 

So today I thought would do a  post with regards to my new machine and the pros and cons of it. I have to say I am a very lucky lady to get this, I mentioned it only once or twice to hubby but didn't think I would be in for a chance of getting one as I had only just purchased a Cameo machine. Bless him he come to me after getting some unsettling news from the hospital and told me to get it ordered before it sells out! I wasn't asking twice!

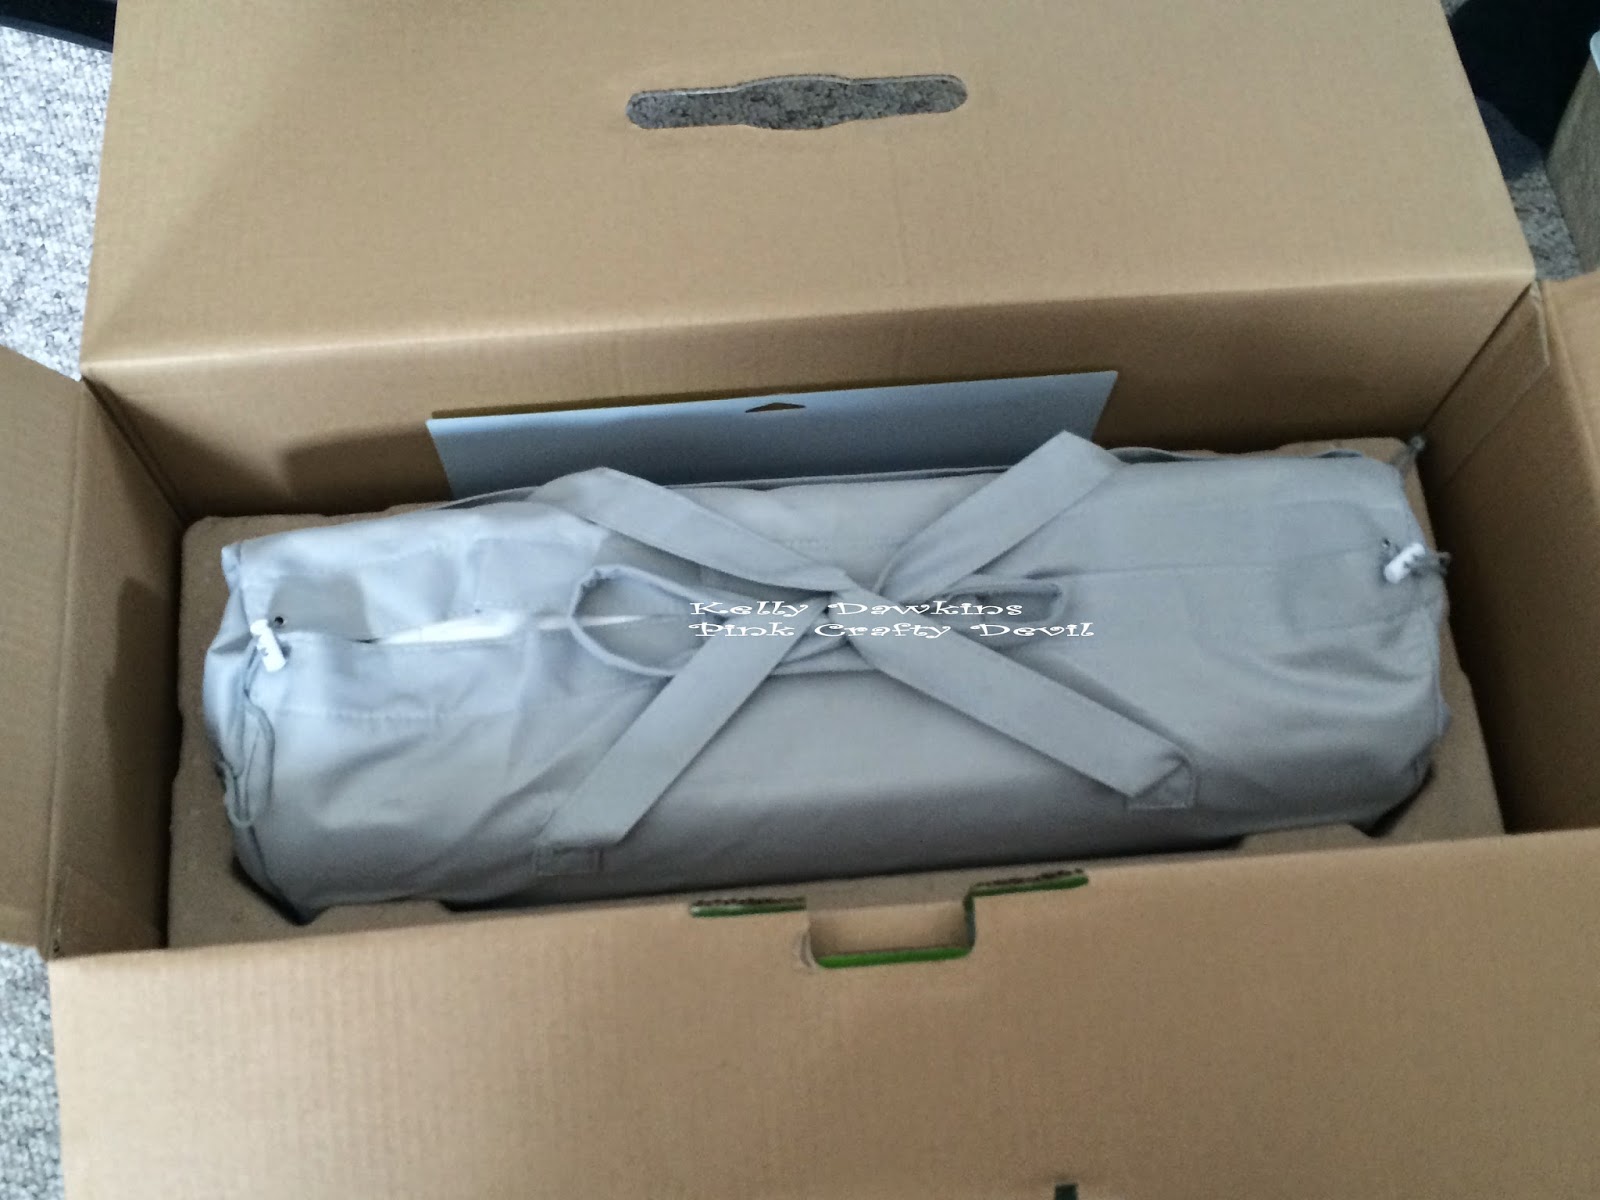
I also took photos of the unpacking of it, to show you exactly what you get in the box because some websites are not 100% clear of what you get. 

I will leave the photos as small so that you can view it easier on a tablet or a phone. 


(Please ignore the holes in the wall I moved my second monitor so I could fit him in that slot and snapped a photo, before I could repair and paint it)


I haven't labelled all the photos, as it is pretty clear what is what but I have outlined below what was in the box. 


What Is In The Box 

Cricut Explore Machine 
12 X 12 Green Mat - This is the standard sticky mat 
Power Cable 
Pen - For drawing
"Start Here" envelope
"Project Material" envelope 
USB lead - Machine to Computer - Hubby measured it for me and it is about 2 meters long.
Carry Bag

What is in the "Start Here" Envelope 
Warranty Booklet
What's In The Box Booklet 
Tips and Tricks Booklet 


What is in the "Project Materials" envelope  ** contents may change**
8.25 x 10 inch - Blue Duck Tape
8.25 x 10 inch - Multi-coloured Duck Tape
2x A4 Black card stock
5.25 x 4 inch - Teal blue card
11.75 x 3 inch - Iron on Vinyl 
Instructions for Duck tape and Vinyl. 


So that is what we get in the box I ordered mine on the 16th at 3 o'clock via Amazon and as I am a prime customer I took delivery of her on the 17th at lunch time. Less than 24 hours - perfect.


Okay the most important bit. 

Pros and Cons 

Pros 
Can use both SVG and Cartridges
Quiet at cutting
Can use a pen and a blade together

Cons
Design studio is internet based only
Design space is not 100% user friendly, I would say I am confident with a computer and it even has me baffled at some points.
Design studio can be slow. 

Now I have had her for a few weeks and to be totally honest it has been a love / hate relationship I have hated her and got her box back out ready to ship  her back, but really liked the idea of combining all my SVG/ Cutting files and cartridges together to create unique layouts/cards - so I have persisted with her and to be honest I am really starting to fall in love with her, the other day I didn't have a certain image on any of my cartridges but I did have it in a SVG file so I could combine the two without having to start up the cameo machine! 

I will keep on playing with her and I will do a comparison between the explore, the Cricut original and the cameo machine and I will try and do it in a easy to view chart for you.

Please remember these are only my opinions on the machine I am no way affiliated with Cricut and I receive no profit from them for doing this post and I purchased the machine with my hubby’s hard earned cash - ha ha.


Thanks for stopping in! 
Crafty Hugs
Kelly
xxx