Morning Everyone.
Well what a surprise for me I have been picked to become a guest designer for the Bah Humbug Challenge Blog ( http://bah-humbug-christmas.blogspot.com )
I can not believe it, I put in for it, but never thought that I would be in with a chance of it, so I am over the moon with it...
I am not going to tell any more, but as soon as I can I will release further details on here for you all, and I will also share with you my creations.
Thanks for reading
One well over the moon
Kelly
xxx

Wednesday, 23 February 2011
Drinking Diva
 I have made this card for a friend of mine who is a teacher, and likes nothing better then to sit back and relax at the end of a long week. I thought this card was a bit cheeky and a bit "diva" like. It is a digital stamp that I downloaded and I have coloured it in using, Pro Markers, Whipser Pens, and Glitter. I then used my Nestabilites to create the matting and on the red card I have run it through a spotty embossing folder using the Cuttlebug. To finish the card I have created a single red rose using my Cricut machine, and embellished it with a flourish, I then used three red gems on the opposite side of the card, and at the top I have used a red bow to finish the card off.
 I hope you like the card and again any comments would be greatly appreciated.
Hugs
Kelly xxx
Fairy Wishes

Morning Everyone,
I have created this lovely card for a little girl who is turning eight.
I have used a Lilli of the Valley Fairy Stamp and coloured it in using pro markers, and chalks. To create sparkle the inside of the wings has been glued and glittered to make it all sparkly.
The flowers have also got a little bit of sparkle to.
I matted and layered the image onto two different types of pink card, and then matted and layered this onto two butterfly backing papers. I edged the card with silver peel offs and stamped a sentiment.
I tied a bow to the side of the card to embellish.
I hope you like and would welcome any comments.
Hugs
Kelly
xx
1st Birthday Card

 Hello Everyone,
Well what can I say about this card, apart from I love it.. I made this card for my cousins little boy who is turning one, and decided to go for the animal theme card. I just love the train, so decided to make a train carrying the animals on, I cut the train out at 2 and 1/2 inches and then used the Create and Critter Cartridge and decided to have a monkey driving the train, a lion, giraffe and elephant been driving around. I used the Paper Doll Every Day Cartridge for the train track, and used white pen to give it some details. For the green hill, I basically used a sheet of green card stock and using my purple cow, I changed my cutter blade to a rough look on, and cut it to size, and stuck this to the blue card stock. For the balloon, and the clouds I used the Create a Critter Cartridge again. To give some details I used a thin liner pen and created a fake stick look, i did this around the edge of the blue base card and around the clouds, I then wrote 1 Today! in the same pen.
For the Name I used the same blue as the base card, and used the "All Mixed Up" cartridge and created the name, and mounted this onto the same orange card that I used for the lion and the giraffe.
To finish the card off I used a selection of light blue and dark blue buttons and googly eyes on the animals, balloon and train.
To make the card I used a easel card frame, but created it in a4 card.
I hope you like and any comments would be greatly appreciated.
Thanks for looking and I hope to see you again soon
Hugs
Kelly
List of Cartridges
here I have just quickly listed what cartridges I used and what I cut with each cartridge for a quick and easy reference.
Create a Critter- Train, Animals, Balloon, Clouds
Paper Doll Every Day - Train Track
All Mixed Up - Name
Hugs
Kelly xx
House Mouse Valentines Card - Husband

Hello Everyone I have made a card for my husbands valentines card, I used the "love collection" from Joanna Sheen and these are unmounted stamps, I picked the image, as my husband seen it on the telly and he commented that, that image was his favorite. I used the Cricut machine to create the frame and his name down the side, I used some left over backing paper from another card, which is a heart, coloured in, scanned into the computer and then using a software package I created the backing paper.
I hope you like the card and I hope to see you back soon.
Hugs
Kelly x
I hope you like the card and I hope to see you back soon.
Hugs
Kelly x
Valentines Card


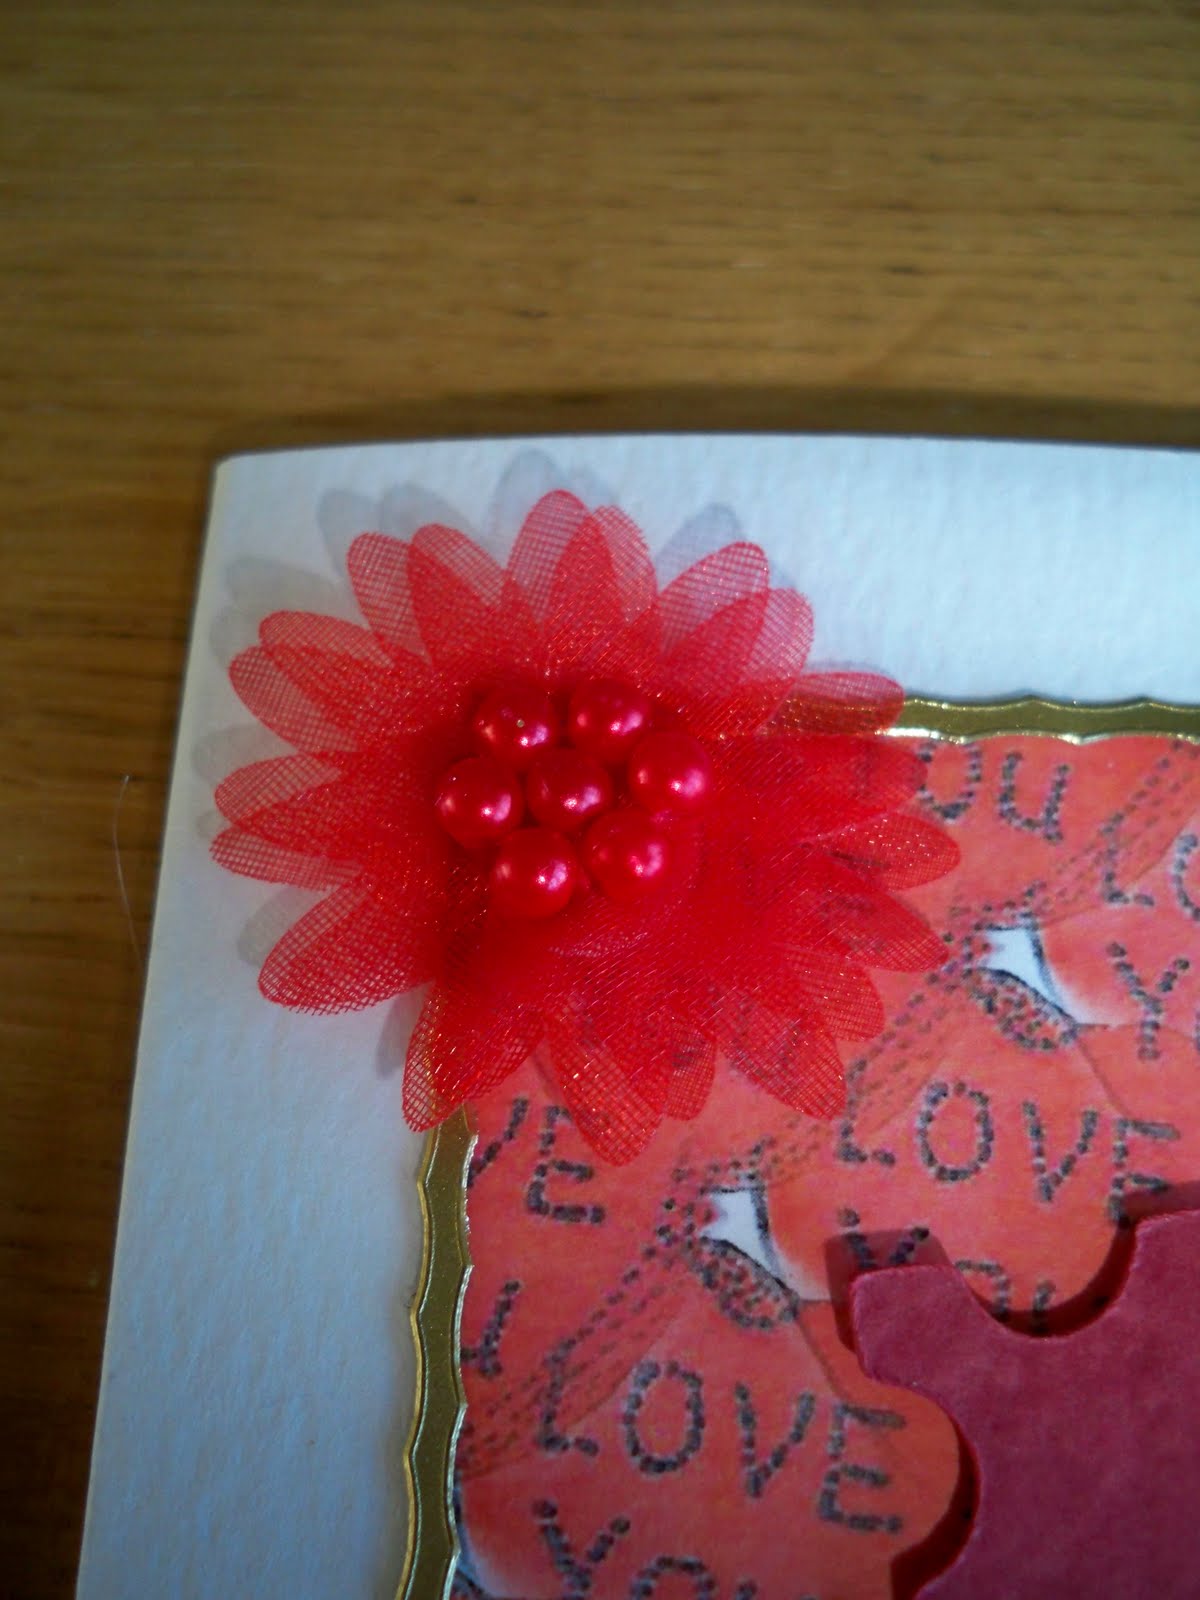

Here is a A4 Valentines card that I have made, I used the "House Mouse Love Collection" from Joanna Sheen, they are unmounted rubber stamps. I used my Pro markers to colour in the stamped image, and then used one of the smaller stamps which is in a shape of a love heart, coloured this in, scanned it in and created a backing paper. I then used my Cricut machine and created the flower spray that is in the corner of the card. I also used the Crict machine to create the frame around the card. I finished the card of with gold peel off borders, three red gems, and a red flower in the top corner.
I hope you like it and again any comments would be greatly appreciated.
Thanks for looking I hope to see you again soon.
Hugs
Kelly x
Wednesday, 16 February 2011
I'm International
Wow
I can not believe it.
I come across a link the other day to submit house mouse cards to the house mouse team of America. So I took the plunge and decided to submit one of my cards, I had to write a description off what I did to produce the card and then submitted it, I got a reply back saying that the team were looking at my card and would be in touch... I didn't think anything off it, and the next day I received an email to say that they have submitted my card.
Here is the link http://www.house-mouse.com/php/stamped_show.php?id=1040
I am over the moon with it and hope you like it to
Thanks for looking
Regards
Kelly xx
Friday, 11 February 2011
House Mouse Poppy Birthday Card
Hello Everyone,
Well here is another birthday card that I have made today, I have made this for a relatives birthday and hope that she likes it.
I have used a house mouse stamp for this image. See below for a list off items used. I have photographed this from various sides to give you the dimension to the card.
Again thank you for taking the time to look. All comments are greatly appreciated.


Items Used
White card stock
Pink card stock in two various shades
Dark pink flower backing paper
Light pink backing paper
Cricut Wild Card Cartridge for the leaves and the swirls
Flower embellishment (from old stock)
brad in the middle of flower is a metallic pink brad pushed through a flower gem
House Mouse Poppy Stamp, from www.joannasheen.co.uk
Thanks for looking
Hugs
Kelly xx
Thursday, 10 February 2011
Bah Humbug Challenge Card- Buttons and Ribbons

Hello Everyone,
This is my second challenge card I have done for the http://bah-humbug-christmas.blogspot.com this week was to make a card using ribbon and buttons. So for my card I have used a contemporary backing paper off snowflakes in the colours of brown, green, blue, and pink. I matted this onto the white card base. I then used the Octagon Nesstabilities the largest one of the set run this through my cuttlebug and then embossed it using the largest embossing folder cuttlebug do, and this one was called holly and ribbon, I then used pastel chalks and chalked baby pink over it. I stamped and embossed my image coloured it in using pro markers and used glitter glue to add the dots to the party hats. I attached this to the embossed shape using foam pads. The ribbon is tied into a pretty bow at one end, the ribbon I used is a shear lilac ribbon. I then cut out two sentiments one saying "It's Party Time" the other saying "White Christmas" I mounted the "White Christmas" saying onto white card, and fake stitched using lilac glitter glue. I put this onto the card using foam pads. The saying "Its Party Time" is stick flat onto the card. I have them embellished the card using two lilac buttons and one pink button and attached these to the bottom of the card. I also stuck five silver snowflakes around the image to give extra glam.
Hope you like and as always any comments are greatly appreciated good or bad.
I will be back soon, with Valentines Cards
Hugs
Kelly xx
Wednesday, 2 February 2011
Bah Humbug Challenge Card

Hello Everyone,
I have created this card for the Bah Humbug Challenge, Something Old and Something Gold. The card the I have created is a fancy style fold, it fits perfectly into a C5 envelope, and only takes one sheet of card to create. I will try and put instructions up on how to make it later on ...
For the topper I decided to use a stamp I had been giving a few years ago that I had forgotten about, it is a teddy bear stamp holding up a banner saying "Happy Christmas" and around the outside it has written on saying "teddy says it's time to hang up the decorations". I used a gold tinsel embossing powder to create the gold look... To finish the card I went for a vintage come clean look, so I used a cream card and distressed the edges, then embossed a spotty design onto white card and matted this up, the topper was then put on cream card and again mounted to the now matted white spotty card. The side of the card was embellished with gold snowflake peels offs and in the card I have placed two "Merry Christmas" and finally to complete the look I have gone around my white spotty card with gold peel off borders and added a gold bow to the right hand top corner.
I hope you like my card and thanks for looking, any comments are greatly appreciated good or bad.
Until next time
Hugs
Kelly xx
Tuesday, 1 February 2011
Male Birthday Card

This card I made for my Dads birthday I decided not to use a computer or a Cricut for this card (boy was that hard) To start the card I used a Brown Card blank, I then stamped a background using brown ink onto white card for the center section, I used a brown card that i rounded the corners off, mounted a white section off card which I brown destressed the edges with stamped DAD four times, I then stamped and embossed my main image, and coloured him in, I stamped him twice cut the second image out and put him on foam pads.. I then wrote on the ZZzzzzz For the greeting, I used a banner saying Happy Birthday and again mounted this onto brown card, for the ribbon i used my promarker coco and coloured in white ribbon... I then attached this to make it look like a sign to a piece of mattered card with a saying of "do not disturb" I finished the card off with Amber gems.
Hope you like
Thanks for looking
Hugs
Kelly x
Dino Birthday Card Two
 This is a second birthday card for my friends other little boy, and again I have used the Cricut Create a Critter Cartridge and a Font Cartridge for the wording.....
Thanks for looking
Hugs
Kelly
xx
Dino Birthday Card
 I made this lovely little card for a friends boy and he is two. I have used the Cricut Create a Critter Cartridge for the dino, and the Happy Birthday, and the for the name and the number two I have used a font cartridge.
The backing paper I believe is off a cd and this is mounted onto a white card base
Thanks for lookins
Hugs
Kelly x
House Mouse Birthday Card

This lovely little card I have made was for my mam's birthday, I stamped and decoupaged up the House Mouse Cake Image, and used some lilac cake backing paper. I then made the flowers by hand using the Cricut machine
Handmade Flowers - Rose
Well this is the second flower that I made, this time I used the Cricut machine, to cut three flowers out, and twisted the petals into a cone type shape.
This is the design that I have got, and again any comments that you have I would appreciate it


This is the design that I have got, and again any comments that you have I would appreciate it


Handmade Flowers - Scrrunched
Hello All,
Well it has been a long time since I have updated what with getting over Christmas and then lots of Birthdays in January.
I have had a go lately at making Handmade flowers I have had a go at scrunched flowers and a flower that I have called Rose.
The scrunched flowers are lovely and very unique to every flower. How I made my flower I cut out Five pieces of card using a nestabilitie die cut, wet the card, and scrunched it up like I would role up a piece of rubbish paper, and glue it together using a glue dot on the botto m off each layer and scrunch to suit the style of card.
This is the result, I got and any comments would be greatly be appreciated
Thanks for looking
Hugs
Kelly x
Well it has been a long time since I have updated what with getting over Christmas and then lots of Birthdays in January.
I have had a go lately at making Handmade flowers I have had a go at scrunched flowers and a flower that I have called Rose.
The scrunched flowers are lovely and very unique to every flower. How I made my flower I cut out Five pieces of card using a nestabilitie die cut, wet the card, and scrunched it up like I would role up a piece of rubbish paper, and glue it together using a glue dot on the botto
 m off each layer and scrunch to suit the style of card.
This is the result, I got and any comments would be greatly be appreciated
Thanks for looking
Hugs
Kelly x
Subscribe to:
Posts (Atom)